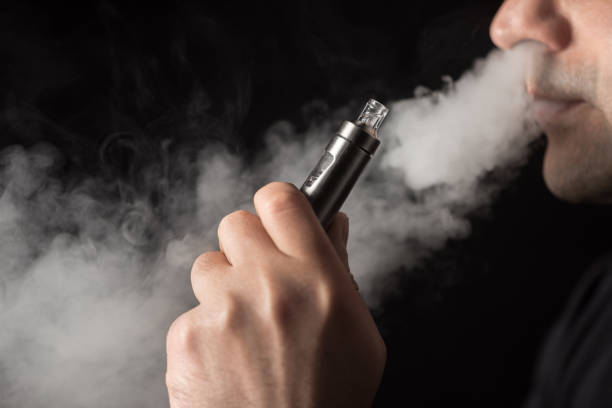
E-cigarette photography has gained popularity as more people are interested in capturing the beauty and elegance of vapor clouds. This article aims to provide valuable insights into the art of e-cigarette photography, offering readers a comprehensive guide on capturing stunning vape shots.
We will discuss the satisfaction derived from capturing the perfect vapor cloud, steps on how to achieve it, and conclude with helpful tips to improve your e-cigarette photography skills.
The Joy of Capturing the Perfect Vapor Cloud
A certain satisfaction comes from capturing the perfect vapor cloud, as it represents a moment of pure artistry and skill. The swirling patterns, dramatic lighting, and unique shapes formed by the vapor create a visual feast for the eyes. The ability to immortalize these fleeting moments in a photograph is an achievement in itself.
Moreover, capturing the perfect vape shot is not just about creating a stunning image. It’s also about showcasing the vaping lifestyle and culture.
E-cigarette enthusiasts take pride in their vaping techniques, and the ability to showcase their skills and talents in creating clouds adds to their credibility. A well-executed photograph of a vapor cloud is a testament to the photographer’s ability to understand and appreciate the art of vaping.
Steps on Capturing the Perfect Vapor Cloud
Before we dive into the steps to capture the perfect vapor cloud, it is essential to understand that this art form requires patience and practice. With that in mind, here are the key steps to follow:
Step 1: Choose the Right Equipment
Investing in the right equipment is crucial to capture stunning vape shots. A high-quality camera with manual settings and a fast lens is essential.
Additionally, a tripod can help stabilize the camera and allow for long exposures, while external flashes or continuous lighting can help enhance the vapor’s visibility and overall aesthetic.
Step 2: Find the Ideal Location
The location plays a crucial role in the outcome of your vape shots. Choose a location with minimal distractions and clutter; a clean background will emphasize the vapor cloud.
Additionally, ensure that the area has proper ventilation to prevent the vapor from dissipating too quickly.
Step 3: Experiment with Lighting
Lighting is a critical element in e-cigarette photography. Experiment with different lighting setups to find the one that best highlights the vapor cloud’s texture and detail.
Backlighting, for instance, can create a dramatic effect, while side lighting can emphasize the cloud’s shape and volume.
Step 4: Understand and Control the Vapor
To capture impressive vape shots, you need to have a good understanding of vapor production and control.
Experiment with different e-liquids, coil types, and airflow settings to find the combination that produces the most visually appealing clouds.
Moreover, practice your vaping technique using the perfect device, like the Miracle Pod mode V4 to ensure you can create consistent and eye-catching vapor clouds.
Step 5: Master the Camera Settings
Familiarize yourself with your camera’s manual settings to capture the perfect vape shot. Experiment with different apertures, shutter speeds, and ISO settings to find the ideal combination that brings out the best in your vapor cloud.
Additionally, consider using burst mode to capture multiple images in quick succession, increasing the chances of getting the perfect shot.
Conclusion
E-cigarette photography is an art form that requires practice, patience, and a keen eye for detail. By following the steps outlined above and continually refining your technique, you can capture stunning vape shots that showcase the beauty and elegance of vapor clouds.
Remember to experiment with different settings, equipment, and techniques to discover your unique style and create captivating images that reflect the essence of the vaping lifestyle.


